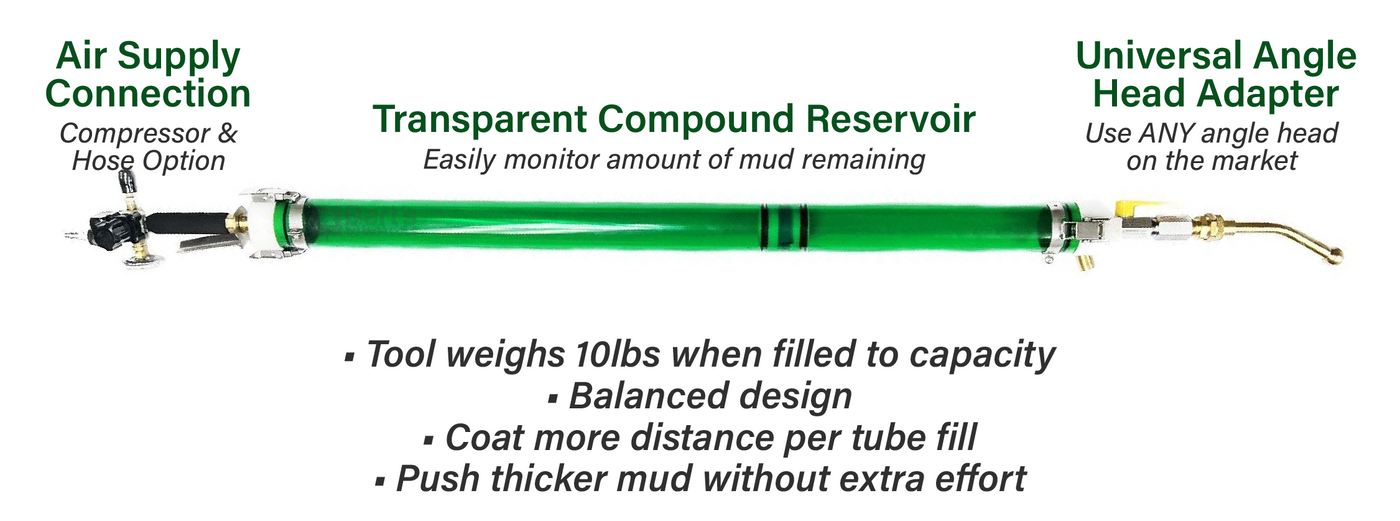

The Cannon comes in 5 parts. The green Cannon tube with piston. The Air End complete with trigger. The Mud End with filler nozzle. The brass gooseneck for the angle head. And, the 50’ Air Line.
SET UP CANNON
1.
Lube interior piston with liquid hand soap from Dollar Store or Family Tree. Push the piston out of the green tube, put one of the black seals back in the green tube, soap the blue wiper strip, sprinkle the soap/blue wiper strip with water, then fully push the piston into the green tube. Now, put one side of the green tube against a wall and with your lungs blow the piston to that other end of the tube. Turn the Cannon tube around, place against the wall and blow the piston back to the original side of the green tube. The inside of the tube is now fully lubricated.


2.
Attach the mud end with gooseneck (it has 2 clamps) to one end of the green tube (with hook straps) by clamping them down. Attach the air end to the other end of the green cannon tube using the 2 clamps onto the hook straps.


3.
Attach black air hose to compressor and cannon
4.
Compressor should be at least 1 HP with a 2-gallon reserve tank. You’ll need a compressor that reads at least 2 SFCM at 90 PSI. Set air regulator to 30# PSI. adjust by small increments if needed. Generally don’t change air, change black flow valve.
5.
Pull trigger sending the cannon piston to the mud end

6.
Mix joint compound to the consistency of 12 box mud. You can run thicker compound more than usual for your inside 90degree angles (less water, less shrinkage) at no additional effort. If you do, pick your 3-way looser.
7.
Set black flow control just above yellow off handle half way open.

8.
To bleed off the air on the Mud End side of the piston open the yellow handle ½ way, hand pump once to bleed the air off the piston, close yellow handle to off, then hand pump the cannon full. Once you have filled it the first time each day, there will be compound against the piston and you can operate the Cannon all day.


9.
To fill the Cannon, turn the yellow lever perpendicular from the green tube and fill. To operate the Cannon turn the yellow lever parallel to the green tube.


HOW TO RUN THE CANNON
A.) Do no run like mechanical angle box. On verticals, you can start either up or down but do not push hard on the green tube. Pull the verticals all the way down and bend knees at 3 feet, OR, turn the angle head 180 degrees and bend your knees, set the angle head a couple of inches off the floor, bend knees and move up. There is a split second that you pull the trigger and the compound starts coming out. It’s pull air trigger on…..don’t move angle head for a 1/4 second …..then move. When finishing up coating the angle release the trigger about 4 inches from your stop point, go to the end of run then pull off the angle head.
B.) On horizontals, keep the trigger arm bent and extend the tube hand up towards the angle head. Let your feet create your coating speed. As above, pull the trigger, wait a 1/4 second then start coating. Coming into a horizontal 3-way release the material trigger 4 inches before the three way. This will keep the angle head clean.
C.) Cleanup can be performed by spraying water. Don’t ever drop the air end into a bucket of water.
OPERATION
1.) During coating if you see non feathered edge on one side for 2 to 3 inches but not the other side, turn the head around and without the trigger being pulled, glaze back over that spot. Compound already applied to the angle initially will reposition itself and feather at that spot.
If you see non feathered edges on both sides, you don’t have enough compound coming out for your coating speed. Turn the black dial next the yellow handle open just a small amount and coat your angles at your same speed you used before.


